Unlock the Secrets to a Thriving Sourdough Starter
Diving into the world of sourdough baking is an incredibly rewarding experience, but for many, the initial hurdle of keeping a sourdough starter alive and robust can feel daunting. You might be picturing a delicate, demanding creature requiring constant attention, but the truth is, a sourdough starter is remarkably resilient! This comprehensive guide will demystify the process, teaching you exactly how to activate, feed, and maintain a sourdough starter, transforming any initial trepidation into confidence and leading to countless delicious loaves.
Whether you've just received a starter from a friend, purchased one online, or are about to embark on the journey of creating one from scratch, understanding its needs is fundamental. Think of your starter not just as a mix of flour and water, but as a living colony of wild yeasts and beneficial lactic acid bacteria. These microscopic workers are responsible for the magic that makes sourdough bread so unique – its distinctive flavor, chewy texture, and incredible rise. Our goal is to keep them happy, active, and ready for action.
Activating Your Sourdough Starter: Bringing It to Life
Before you can bake with your sourdough starter, you first need to bring it to its peak activity. This "activation" process is particularly crucial if you've purchased a dehydrated starter or received one that's been dormant in the refrigerator. Even a freshly made starter needs a few consistent feeds to reach its full potential.
Getting Started: Acquiring Your Starter
While building a starter from scratch can be a gratifying long-term project, purchasing one offers significant advantages for beginners:
- Instant Gratification: Skip the weeks-long waiting period and jump straight into baking.
- Proven Strength: Established starters are often more robust and active, leading to more consistent results early on.
- Cost-Effective: They're relatively inexpensive, or even free if you get one from a generous baker friend.
Many online purveyors provide detailed instructions for activating their specific dried starters, but the general principle remains the same: rehydrate and feed consistently until it shows reliable signs of activity.
The Activation Process (General Guide)
If you've received a refrigerated or newly acquired starter, activation typically involves a few regular feeding cycles to wake up the dormant microbes. Here’s a basic approach:
- First Feed (Rehydration/Wake-Up): If dried, follow specific rehydration instructions. For a refrigerated starter, let it come to room temperature for an hour. Then, take a small amount (e.g., 25-50g) and feed it an equal weight of filtered water and unbleached all-purpose or bread flour (a 1:1:1 ratio of starter:water:flour). Mix well in a clean jar.
- Observe and Repeat: Place the jar in a warm spot (75-80°F / 24-27°C is ideal). Wait for it to show signs of activity – typically bubbles forming and a slight rise. This first rise might be slow.
- Consistent Feeding: Once you see some activity, repeat the 1:1:1 feeding every 12-24 hours, discarding most of the old starter before each feed (more on discarding below). After 3-5 consistent feeds, your starter should become very active, doubling or tripling in size within 4-8 hours after feeding. This indicates it’s activated and ready to bake with!
Pro Tip: A warmer environment significantly speeds up activation and overall starter activity. If your kitchen is cool, consider placing your starter near a warm appliance or using a proofing box.
Feeding Your Sourdough Starter: The Golden Rule
Once activated, regular feeding is paramount to keeping your starter healthy and strong. Think of it like a pet: when it's hungry, it needs food (flour and water), it eats and produces gas (bubbles and rise), and then it gets full and rests (collapses). Your primary job is to keep it fed consistently.
The Tools You Need
Forget imprecise cups and spoons. For consistent results, a few key tools are essential:
- Digital Scale: This is non-negotiable. Sourdough success hinges on precise weight measurements, not volume.
- Clean Glass Jar: A straight-sided jar with a wide mouth is ideal for mixing and observing growth.
- Rubber Spatula or Spoon: For mixing.
- Rubber Band or Marker: To mark the starter's initial level after feeding, allowing you to track its rise.
The Standard Feed: The 1:1:1 Ratio
The most common and effective maintenance diet for an active starter is the 1:1:1 ratio. This means you feed equal parts by weight of starter, filtered water, and flour. For a deeper dive into this fundamental technique, read our guide on The 1:1:1 Ratio: Easy Sourdough Starter Feeding Guide.
Ingredients:
- Your active sourdough starter
- Unbleached bread flour or all-purpose flour (unbleached is key as bleach can inhibit yeast activity)
- Filtered water (chlorine in tap water can harm the microbes; aim for 75-80°F / 24-27°C)
Step-by-Step Daily Feeding Routine
- Assess Your Starter: Stir it down. It should smell pleasantly yeasty, tangy, and slightly sweet – reminiscent of ripe fruit or beer. If there's a thin layer of dark liquid (hooch) on top, it's very hungry. Pour off the hooch if it's dark, or stir it in if it's clear and minimal.
- Discard: Scoop out most of your starter, leaving a small amount behind. A common practice is to leave about 50 grams of starter.
- Add Water: Add filtered water equal to the weight of the starter you left (e.g., 50g water to 50g starter). Stir thoroughly until the starter is mostly dissolved into the water.
- Add Flour: Add an equal weight of flour (e.g., 50g flour).
- Mix Thoroughly: Stir vigorously until all the flour is incorporated and there are no dry bits or lumps. The mixture should be a thick, paste-like consistency.
- Mark the Level: Place a rubber band around the jar at the top surface of your freshly fed starter. This will help you easily track its growth.
- Rest: Place the fed starter in a warm spot. It will begin to bubble and rise, usually peaking within 4-12 hours depending on temperature and starter strength.
The Art of Discarding: Why It's Essential
For beginners, discarding can feel wasteful, but it's a critical step in how to activate, feed, and maintain a sourdough starter effectively.
- Manages Population: Without discarding, the microbial population would grow exponentially, quickly consuming all available food. You'd need impractically large amounts of flour at each feeding.
- Keeps It Potent: Discarding ensures a manageable amount of starter that can be adequately fed and remains active. The yeast and bacteria don't have to compete excessively for food.
- Prevents Over-Souring: Too much old starter can lead to an overly acidic environment, weakening the yeast.
But don't throw it away! Sourdough discard is a fantastic ingredient for many recipes, like crackers, pancakes, waffles, or even quick breads. This way, nothing goes to waste!
Maintaining a Robust Sourdough Starter for Consistent Baking
Maintaining your starter means understanding its rhythms and adapting to its needs. A healthy, active starter is the cornerstone of great sourdough bread.
Signs of a Healthy Starter
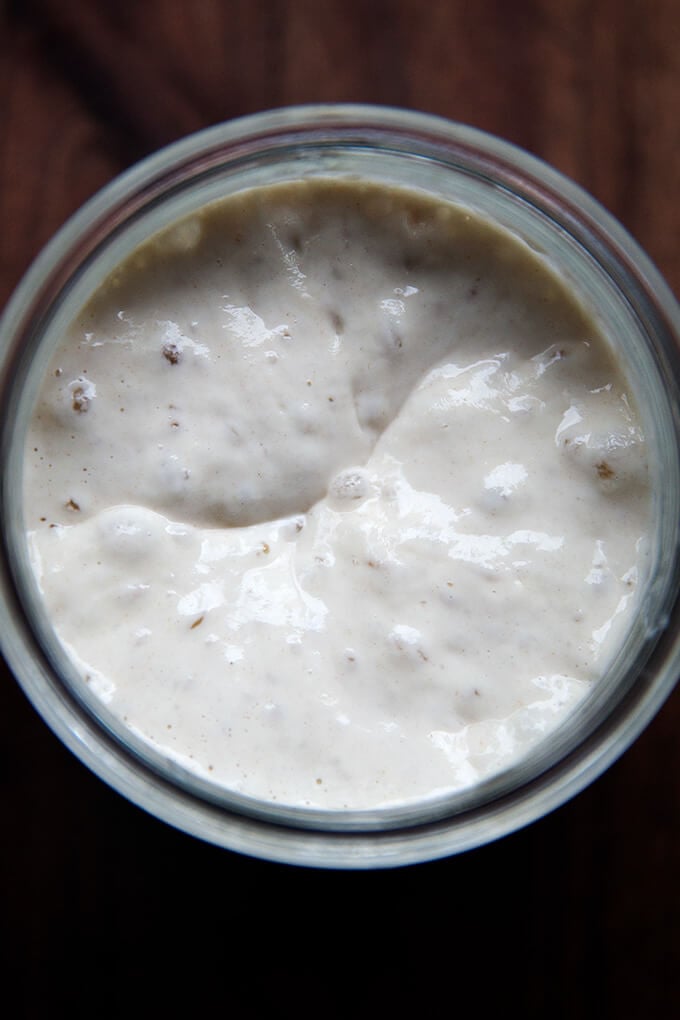
- Predictable Rise and Fall: After feeding, it should reliably double or triple in size within 4-12 hours (depending on temperature and hydration), then slowly fall.
- Lots of Bubbles: The surface and sides of the jar should be full of bubbles.
- Pleasant Aroma: A tangy, yeasty, slightly sweet, or even fruity smell.
- Texture: Light and airy at its peak, with a good elasticity when stirred.
When to Adjust Your Feeding Schedule
- Too Fast? If your starter is peaking and collapsing very quickly (e.g., in 2-3 hours), it might be hungry. You can either increase the ratio of flour/water to starter (e.g., 1:2:2 or 1:3:3) or reduce the temperature slightly.
- Too Slow? If your starter is sluggish and barely rising, it might be cold or weak. Move it to a warmer spot, ensure you're using warm filtered water, and consider a slightly richer feed (e.g., 1:0.5:0.5 for a few feeds to boost activity, then return to 1:1:1).
- Hooch: A clear, yellowish liquid indicates hunger. A dark, blackish hooch means it's extremely hungry and likely very acidic. Adjust your feeding schedule to be more frequent, or move it to the fridge if you won't be baking soon.
Storage Options for Convenience
While daily feeding keeps your starter incredibly active, it's not always practical. For less frequent bakers, refrigeration is your friend.
- Room Temperature: If you bake 3-4 times a week, keeping your starter on the counter with daily 1:1:1 feedings is ideal.
- Refrigeration: For baking once a week or less, store your starter in the fridge. Feed it thoroughly, let it sit at room temperature for an hour or two (until you see some bubbles), then seal it and place it in the fridge. It can stay there for 1-2 weeks. When you're ready to bake, take it out, let it come to room temp, and feed it 1-2 times (every 12-24 hours) until it's consistently active again.
For more detailed information on different storage methods and troubleshooting common issues, check out our guide on Sourdough Starter Maintenance: Keep It Alive & Thriving.
Conclusion
Mastering how to activate, feed, and maintain a sourdough starter is the gateway to a world of delicious homemade bread. It's a journey of observation, consistency, and a little bit of patience. By understanding your starter's needs, using the right tools, and committing to a simple feeding routine, you'll soon have a robust, bubbly companion ready to leaven your loaves. Embrace the process, don't fear the "pet," and enjoy the incredible satisfaction of baking with your very own living starter.
