Sourdough Starter Maintenance: Keep It Alive & Thriving
Diving into the world of sourdough baking is a rewarding journey, but for many, the first hurdle isn't the bread itself – it's the mystical sourdough starter. Often perceived as a delicate, high-maintenance creature, the thought of keeping it alive and robust can feel overwhelming. You might hear terms like "hydration percentages," "1:1:1 ratios," and "hooch," instantly conjuring images of a complex science experiment. However, the truth is far simpler: a sourdough starter is incredibly resilient. With the right approach, learning how to activate feed and maintain a sourdough starter becomes an intuitive, almost meditative practice.
Think of your sourdough starter as a living, breathing companion – a happy colony of wild yeast and lactic acid bacteria. Just like any pet, it has fundamental needs: food, water, and a comfortable environment. When it's hungry, it needs nourishment (flour and water). When it eats, it comes alive, producing gas (bubbles) and rising. And when it's full, it eventually collapses and rests, patiently waiting for its next meal. Your primary role is to ensure it's well-fed and strong enough to leaven your delicious loaves.
Getting Started: Activating Your New Sourdough Companion
While the gratification of building a sourdough starter from scratch is undeniable, for those eager to jump into baking, acquiring a starter is often the quickest and most reliable path. A purchased or gifted starter can save you weeks of cultivation, offering a head start with a potentially stronger, more active culture right from the beginning. Many online sources and artisan bakers provide well-established starters that are ready to go with minimal effort.
Once you have your starter in hand, the first step is often activation. If you've received a dried starter, this process involves rehydration over a few days, typically starting with a small amount of water and then gradually introducing flour. For fresh, refrigerated starters, activation usually means bringing it up to peak activity after its dormant period. Here’s a general approach:
- For Dried Starters: Follow the specific instructions provided by your supplier. This usually involves combining the dried starter with warm, filtered water and letting it rehydrate, then beginning a series of small, regular feeds with flour and water until it shows signs of consistent activity (bubbles, rise).
- For Fresh/Refrigerated Starters: Allow your starter to come to room temperature for several hours. Then, perform a few regular feedings (as described below) over 1-2 days, keeping it at a consistent warm room temperature (around 70-75°F or 21-24°C). You'll know it's fully activated and ready when it consistently doubles in size within 4-8 hours after feeding. For more detailed guidance on getting started, refer to our comprehensive article: How to Feed, Activate, and Maintain Your Sourdough Starter.
The Art of Feeding: Mastering the 1:1:1 Ratio
The secret to consistent sourdough success lies in precise feeding. Forget measuring cups and spoons; for effective starter maintenance, a reliable digital scale is your best friend. Volume measurements are simply too inconsistent and can lead to unpredictable results, whereas weight provides repeatable accuracy every time.
The most common and highly effective feeding regimen is the 1:1:1 ratio. This means you feed your starter equal parts, by weight, of starter, flour, and water. For example, if you keep 50g of starter, you would feed it 50g of water and 50g of flour. This ratio provides ample nutrition without being wasteful and is easy to scale up or down based on your needs. To dive deeper into this fundamental method, check out The 1:1:1 Ratio: Easy Sourdough Starter Feeding Guide.
Step-by-Step Feeding Routine:
- Assess & Stir: Before feeding, give your starter a gentle stir. It should smell pleasantly yeasty, slightly acidic, and perhaps a bit like ripe fruit. If there's a dark liquid layer on top (hooch), don't worry – it's a sign of hunger, simply stir it back in.
- Discard: This is a crucial step to keep your starter manageable and healthy. Remove a significant portion, typically leaving about 50 grams for your active starter. Without discarding, your starter would grow exponentially, requiring an impractical amount of flour at each feeding. The discarded portion isn't waste; it can be used in numerous delicious recipes like crackers, pancakes, or crumpets!
- Add Water: To your remaining starter (e.g., 50g), add an equal weight of filtered water (e.g., 50g). Water temperature is important; aim for around 75-80°F (24-27°C) for optimal yeast activity. Chlorine in tap water can inhibit yeast, so filtered or dechlorinated water is best.
- Mix Thoroughly: Stir the water and starter together until fully combined and smooth.
- Add Flour: Now, add an equal weight of unbleached bread flour (e.g., 50g). While unbleached all-purpose flour works, bread flour often contains more protein, providing more "food" for your yeast and bacteria, leading to a stronger rise. You can also experiment with a small percentage of whole wheat or rye flour for added vigor.
- Mix Again: Combine the flour, water, and starter thoroughly. Scrape down the sides of the jar to ensure no dry bits remain. The mixture should have a thick, paste-like consistency.
- Mark the Level: Use a rubber band or a marker on the outside of your jar to note the starting level of your freshly fed starter. This will help you easily track its rise and fall.
Daily Maintenance and Understanding Your Starter's Behavior
Once fed, your sourdough starter will begin its activity. The speed at which it rises and falls is heavily influenced by temperature. A warmer environment (around 75°F/24°C) will lead to faster activity, while cooler temperatures will slow it down. This understanding is key to timing your bakes and managing your starter's schedule.
Signs of a Healthy, Thriving Starter:
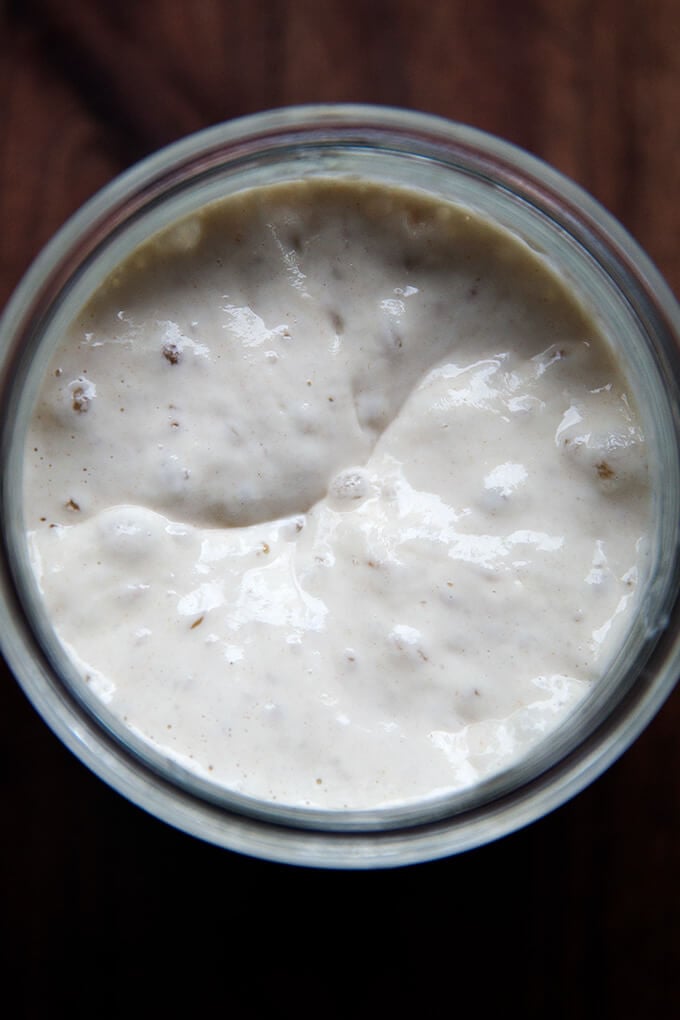
- Vigorous Rise and Fall: After feeding, a healthy starter will typically double, triple, or even quadruple in volume within 4-12 hours (depending on temperature and ratio), before slowly deflating. The peak of its rise is when it's most active and ready for baking.
- Lots of Bubbles: Look for bubbles throughout the starter, especially on the surface. These are a visible sign of the yeast and bacteria producing carbon dioxide.
- Pleasant Aroma: A healthy starter should smell tangy, yeasty, a bit like fermented fruit, or even slightly like beer. It should never smell foul, cheesy, or overwhelmingly like nail polish remover.
- The Float Test: A simple test for readiness: drop a small spoonful of your active, bubbly starter into a glass of water. If it floats, it's full of gas and ready to bake! If it sinks, it might need more time or another feed.
Troubleshooting Common Starter Issues:
- Hooch (Dark Liquid): A layer of dark liquid on top is a normal sign that your starter is hungry and has consumed most of its food. A clear or light amber hooch is fine to stir back in. If it's dark purple, black, or red, or if it smells excessively pungent (like strong alcohol or acetone), it means your starter is very hungry and stressed. It might need a few more consistent feedings to regain its strength.
- Sluggishness: If your starter isn't rising much, it could be too cold, not fed frequently enough, or perhaps needs a change in flour. Try moving it to a warmer spot, increasing feeding frequency, or adding a small amount of whole wheat or rye flour to a feed for an extra boost.
- Mold: This is the only true sign that your starter is beyond saving. Mold typically appears as fuzzy spots of various colors (green, black, pink). If you see mold, unfortunately, you must discard the entire starter and jar, clean thoroughly, and start fresh.
Storing Your Sourdough Starter: When to Take a Break
Not everyone bakes sourdough daily, and that's perfectly fine! Your starter is adaptable. You have options for storage depending on your baking frequency:
- Countertop Storage (Active Use): If you bake frequently (several times a week), keeping your starter on the countertop at room temperature is ideal. It will need daily feeding (or twice daily if very warm) to stay active and ready.
- Refrigerator Storage (Infrequent Use): For those who bake weekly or less often, the refrigerator is your best friend. Cold temperatures dramatically slow down microbial activity, meaning your starter needs less frequent feeding.
- Preparation: Feed your starter as usual, let it sit on the counter for 1-2 hours until it shows the first signs of activity (small bubbles).
- Refrigerate: Place it in a clean jar with a loose-fitting lid or cover with plastic wrap (don't seal tightly, as gases can still build up).
- Feeding Schedule: In the fridge, your starter will typically need feeding once every 1-2 weeks. When it's time to feed, take it out, let it warm up for an hour or two, discard, feed it, and let it sit at room temperature for a few hours until it starts showing activity again before returning it to the fridge.
- Reviving for Baking: When you're ready to bake, take your starter out of the fridge 1-2 days before. Give it 2-3 consecutive daily feedings at room temperature to bring it back to full strength and consistent activity.
- Long-Term Storage (Drying): For extended breaks (months or years) or as a backup, you can dry your sourdough starter into flakes. This involves spreading a thin layer on parchment paper and allowing it to air dry completely, then storing the flakes in an airtight container. Rehydrating dried starter takes a few days of consistent feeding.
Conclusion
Maintaining a sourdough starter doesn't have to be a daunting task. By understanding its basic needs, embracing the 1:1:1 feeding ratio, and observing its behavior, you'll quickly become adept at keeping it alive and thriving. Remember, your starter is incredibly resilient; it's much harder to kill than a houseplant! With a little consistent care, you'll have a robust, active starter always ready to create the incredible flavors and textures that only true sourdough can provide. Happy baking!
